The first step in the verification process of a company is the creation of one on Facebook*. Follow this link to get started. We have also provided a guide on creating a business manager for your convenience.
Company verification process
The first step in the verification process of a company is the creation of one on Facebook*. Follow this link to get started. We have also provided a guide on creating a business manager for your convenience.
Upon creation of your account, you can proceed towards completing the Facebook* Business Verification:
1. Visit Facebook Business Manager* at https://business.facebook.com*
Choose the option of a business account if you have not already created one. You also have the option of creating one by visiting https://business.facebook.com/create*.
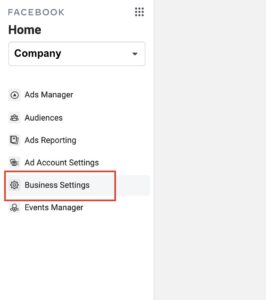
2. Situated on the left navigation bar is the option for ‘Business Settings’. Click on it.
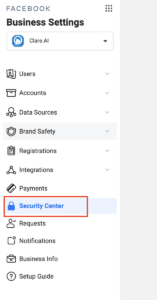
3. The ‘Business Settings’ option will take you to a sub-menu on the left navigation bar. Next, click on ‘Security Centre’.
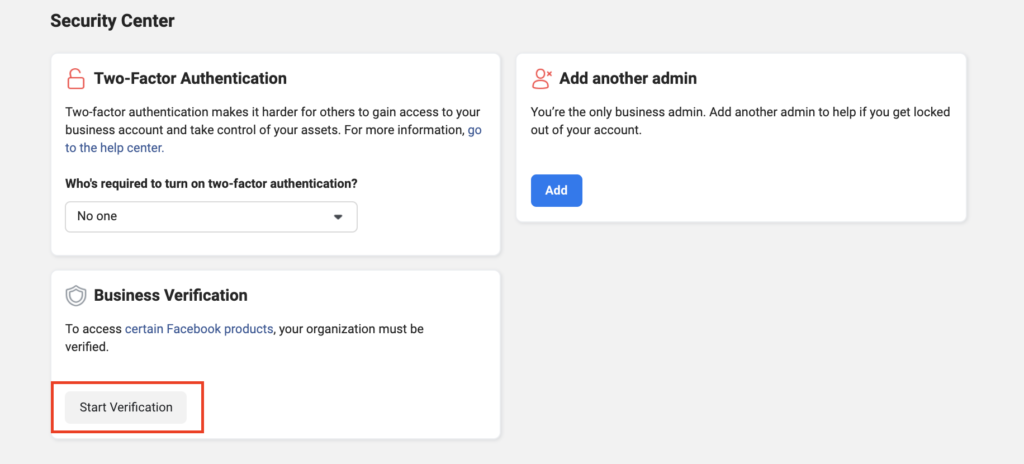
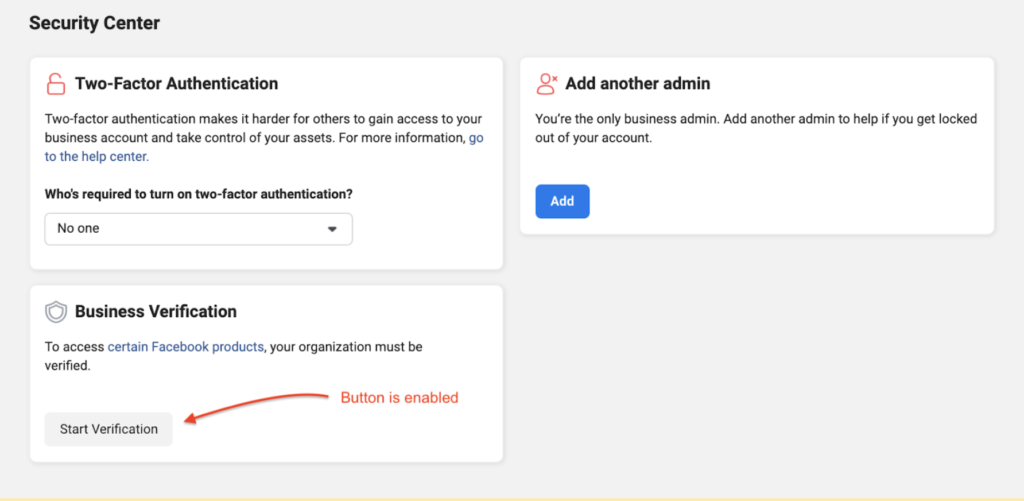
4. Select the button that says ‘Start Verification’
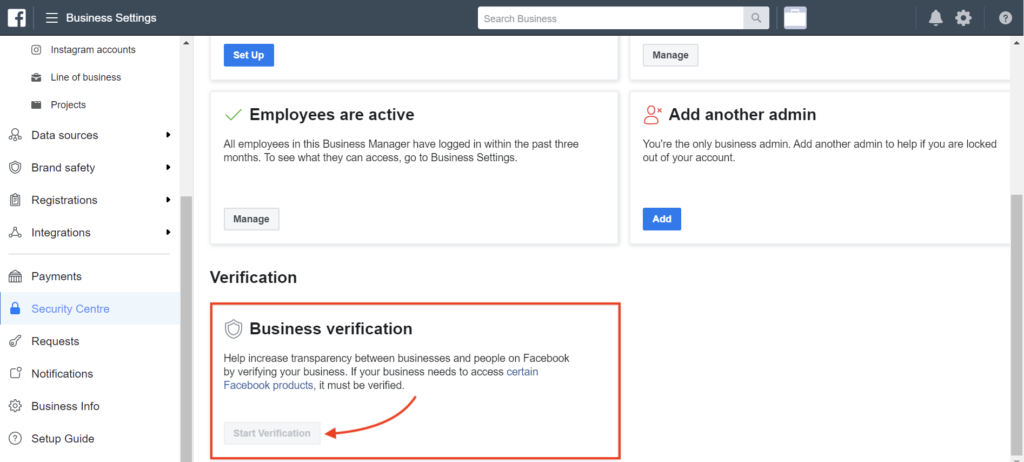
Sometimes, the ‘Start Verification’ button cannot be selected. In such cases, you will need to go through a few steps before that can be done. Below in this article, you will find details on what to do to enable that button.
5. The next form you will be prompted to fill is the ‘Business Details’ one.
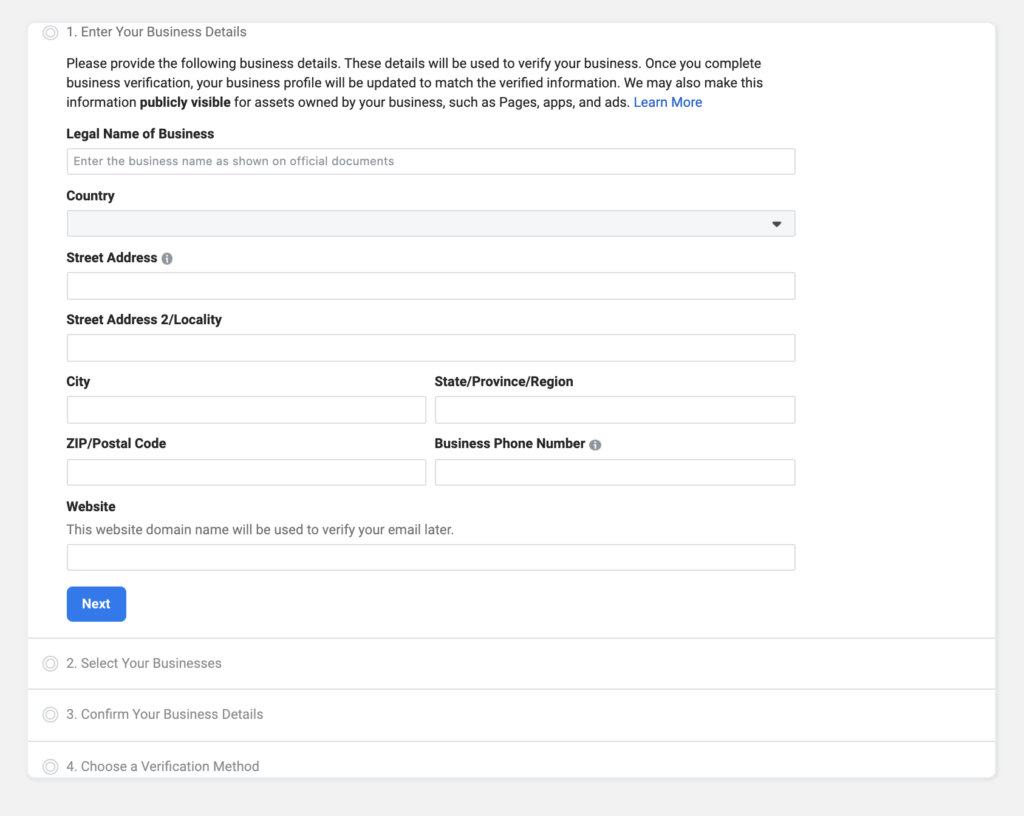
The documents you will need to verify your company on Facebook Business* Verification:
1. Proof of Legal Name – one of these will suffice:
- Company Incorporation Certificate
- Business Registration (BR)
- VAT/Tax Certificate
2. Proof of Address – one of these:
- Utility Bill (Electricity/Phone bill)
- Bank Account Statement
As soon as you have submitted the documents for verification to Facebook Business Manager*, you will be sent a one-time password (OTP) via text, email, or phone call to verify the account. For some countries, the phone number option is still unavailable. The verification code should reach you instantly. If not, you can put in a request for a new one. If there are still issues in receiving a code, please read this article on troubleshooting phone number errors.
As soon as your company is verified, you will see in Business settings -> Business Info.
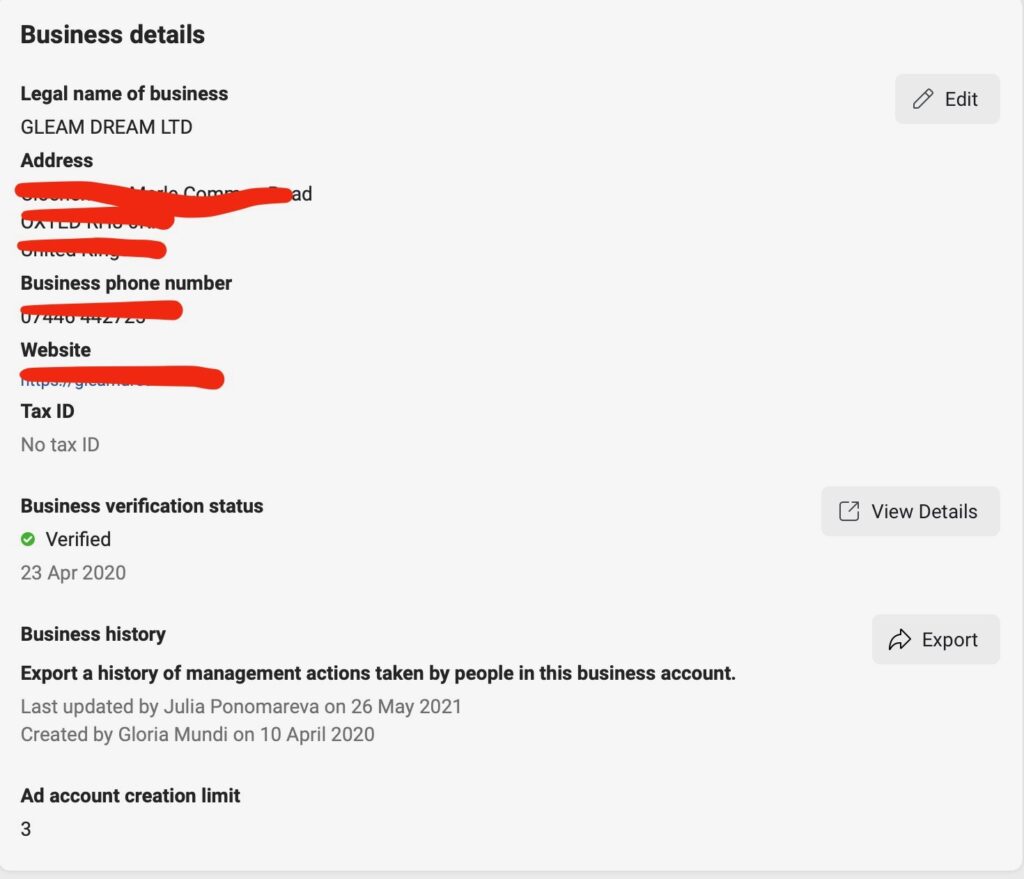
Domain verification
Domain verification ensures the provision for you to claim ownership of your domain used for Facebook Business Manager*. The business account also enables you to access Facebook Ads Manager*. Logging in to the Facebook Business Manager* is paramount for the protection of your valuable content available on Facebook*; along with having accessibility to features associated with your domain and its tracking.
It also brings credibility to the company.
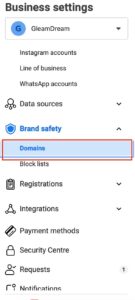
Go to Business settings – Brand safety -> Domains – > Add a new domain
DNS Verification
- Visit the DNS settings page by signing in to your domain registrar.
- Insert a TXT type, new DNS record.
- If required, in the hostname field, type the @ symbol.
- Paste the TXT record provided by Business Manager for verification in the content field.
- Navigate back to Business Manager and tap ‘Verify’
HTML File Upload
- Download the HTML file.
- Upload the file into your website’s root folder.
- Go back to the Business Manager and select ‘Verify’.
Meta-tag Verification
- In the homepage code of your website, open the <head> section.
- Add the meta-tag in the HTML code of the <head> section.
- Confirm if the meta-tag has been added by viewing the HTML source code of the homepage of your website.
- Go back to the Business Manager and tap ‘Verify’.
How long does Facebook* Business Verification take?
Once the application for verification has been sent, it takes approximately 1-5 business days for a response to be given. Once all goes in accordance and as per Facebook* policies, your Business Manager will be verified.
What if the verification button is disabled?
This is a common occurrence amongst most new business accounts; specifically, the ones which are not using apps requiring Facebook* Business Verification.

Follow this guide to enable the button:
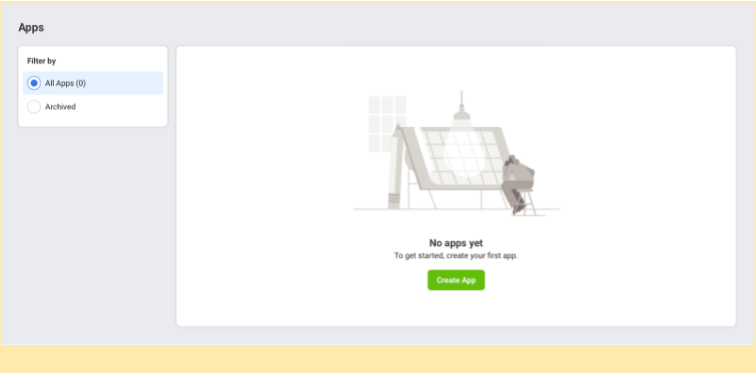
1. Visit Facebook* Developers page. Select ‘get started’ or ‘My Apps’ displayed in the top right corner
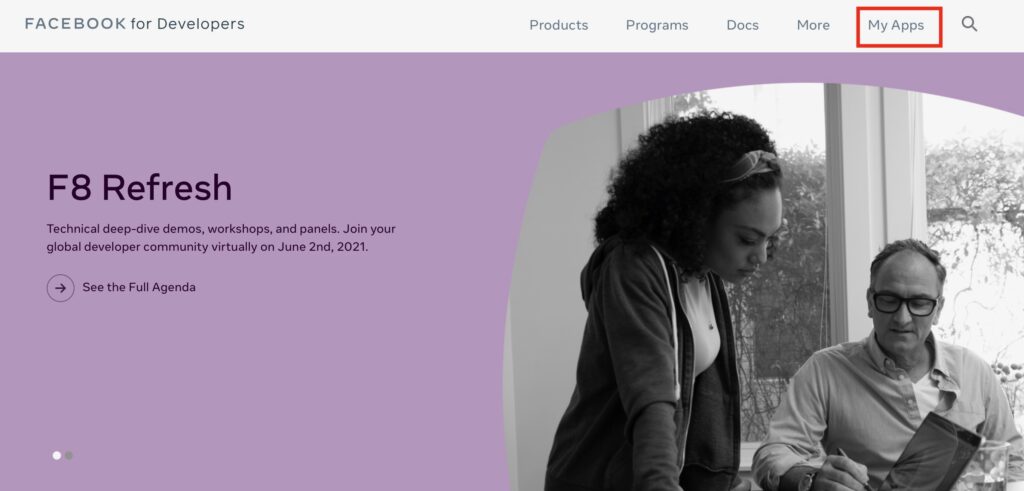
2. Select the ‘Create an app’ option
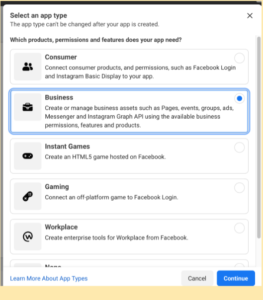
3. Pick any of the available options from pop-up display and press ‘continue’
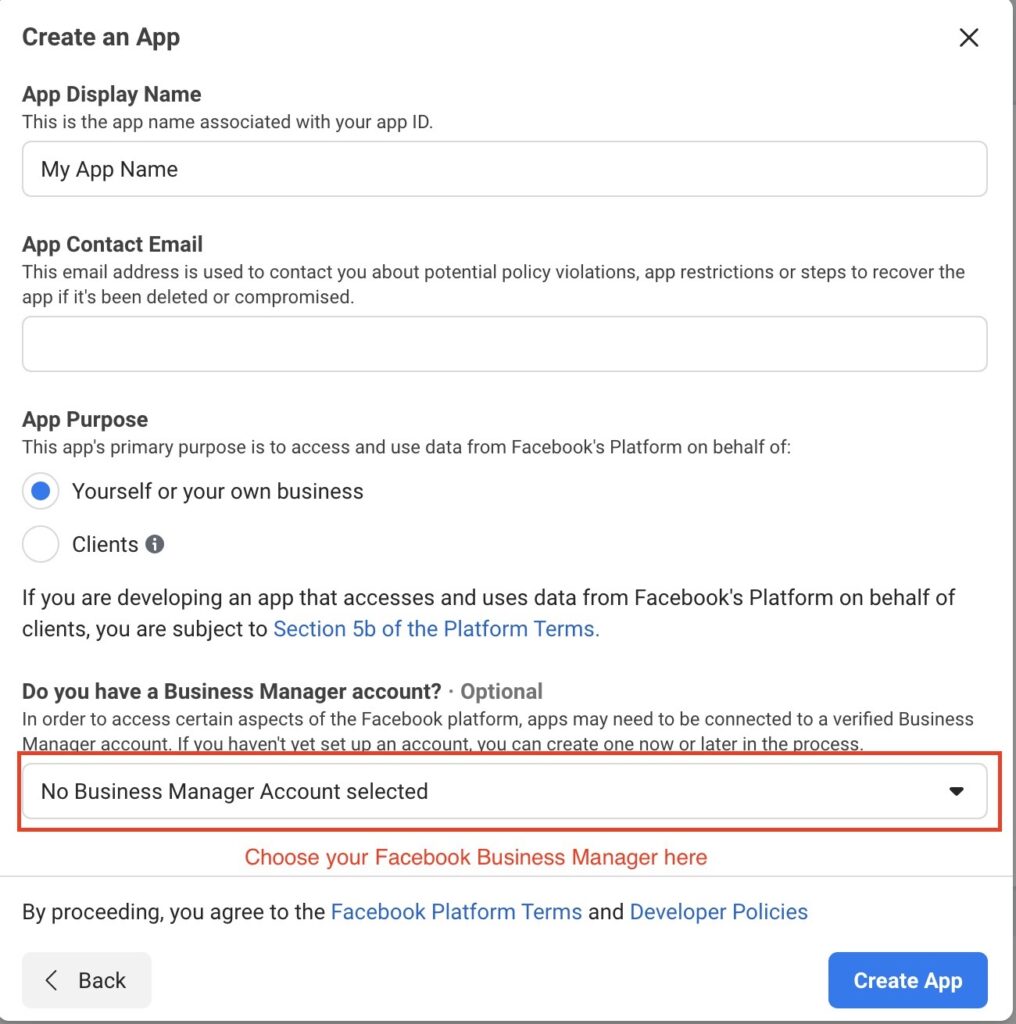
4. Input the following details: your email address, app name and purpose of the account. Then select your Facebook Business account* from the drop down menu and select ‘Create App’.
5. You’re done. You can come back to the Facebook Business Manager* –> Security Center and the ‘Start Verification’ button shall be enabled
Now that your Facebook* Business account is verified, what’s next?
You’ll want a powerful way to communicate with all those new customers who like your page. That’s where WhatsApp* Business API comes in.


