Are you a business owner looking for opportunities to take your business to the next level? Then, there is good news for you! Facebook* offers you a managing tool that allows you to leverage its business features in order to enhance your business portfolio and marketing experience. Here in this article, we will take a look at this tool and its importance. But, most importantly, we will walk you through the steps to setting up your Facebook Business Manager* Account.
What is Facebook Business Manager*? Why Use It?
Facebook Business Manager* is a tool that acts as a centralized control system that allows you to create and manage your business portfolios and as well offers you features for your Facebook* ads and pixel.
So, why does it matter? It matters because:
- It allows you to see who access your pages and Ad accounts
- Allows you to manage user’s permissions. So, you can grant fine-grained permission to specific individuals who assist your business operations.
- It allows you to share your Business Manager account with agencies and vendors so that they can help manage your pages or ad campaigns
- It allows you to manage your Facebook*, Instagram* business page, ads, and many more in one centralized location.
- It keeps your business secured.
- You want to use WhatsApp* for business, and you need a verification badge for your business account
Steps to Creating a Business Manager Account
Here are steps to creating your Business Manager Account
Getting Started
STEP 1: Go to https://business.facebook.com/overview* to create an account, or you can make use of your existing Facebook* account by clicking on your profile at the top right corner of the page.

STEP 2: Once you click on the “Create Account” button, a new dialogue box will open that presents you with a form to fill in your basic information. Insert your business name, full name, and email. Then click on the “Submit” button
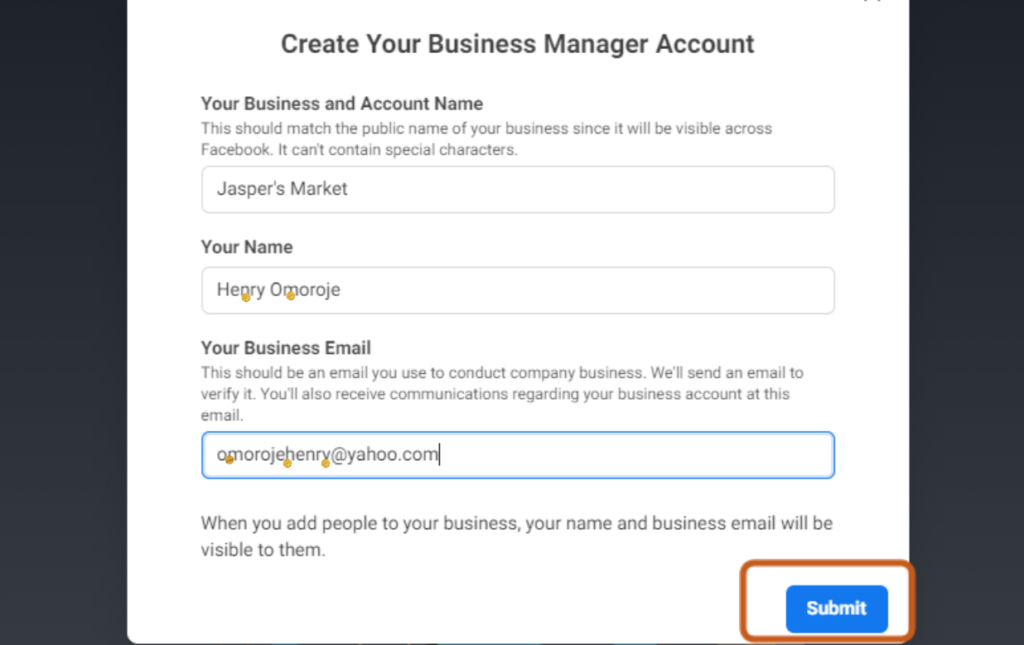
As soon as you fill the form and click the submit button. Facebook* will send you a verification mail requesting you confirm your email. Your confirmation grants you full access to the dashboard.
Remember: If you are using an existing account, you won’t have to go through email verification again. If you already have a business account, both accounts will be listed on the dashboard. You can easily switch between accounts by clicking on “Switch Business Account.” Or click on the dropdown menu beside the business name.
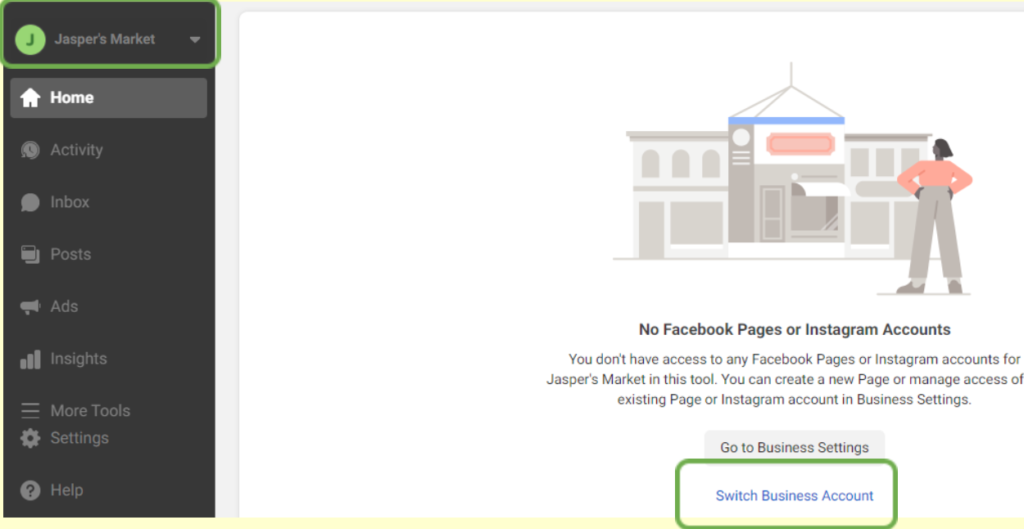
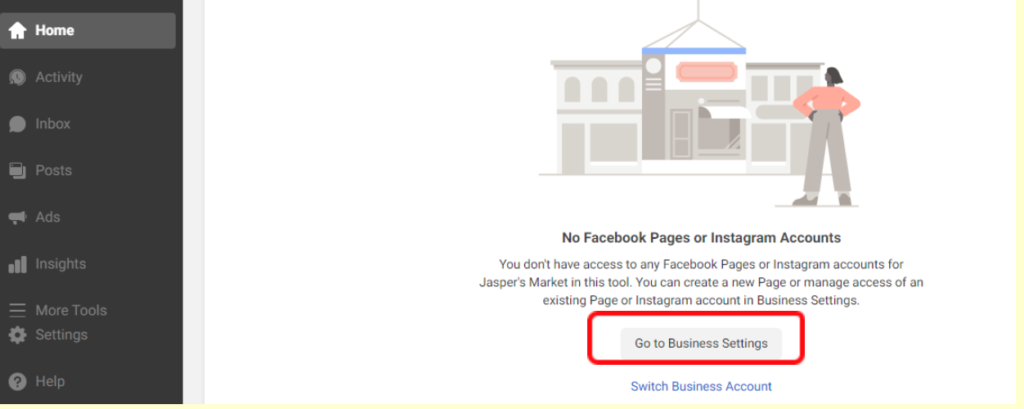
STEP 3: Now, we need to do the basic setup of the Business Manager pages, accounts, Instagram* accounts and grant permission to people. The dashboard looks like the image above. To carry on with Business manager settings, click on the “Go to Business Settings.”
How to Add Pages to Business Manager Tool
Let’s start with adding pages to our Business Manager. The option allows you to add pages connected to your business. All you have to do is to provide the URL and name of your Facebook* page. In addition, you have the option to create a new page if you don’t own one. You also have an option to “Request access to a page.”
To add pages to your business, click on “Business settings” =>” Accounts” =>” Add” =>” Add page” =>” Enter Url” =>Click on “Add Page”
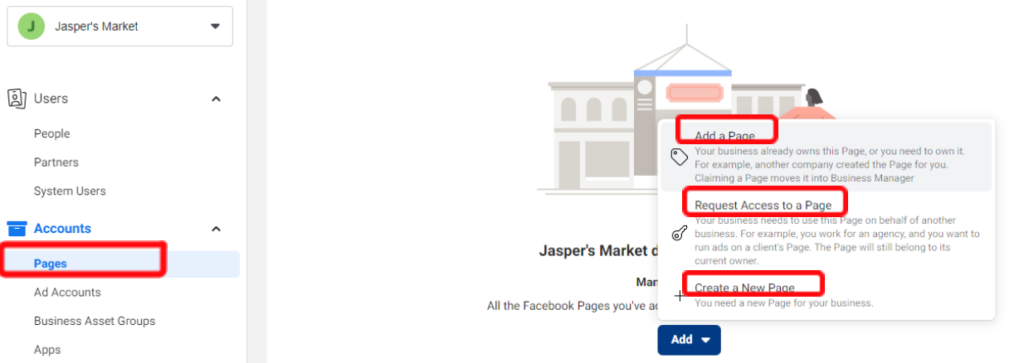
Note that: Adding pages to your business page is needed to run most Facebook* ads.
How to Add Ad account to Business Manager tool
In the Business Manager, you can add ad accounts owned by you or request access for other people or business Ad accounts. You can also create a new Ad account if you don’t have one.
To add Ad account, go to Business settings. Click on “Account” => “Ad account” => “Add” => “Click on any of the three options” => “Add”

How to Add People to Business Manager Tool
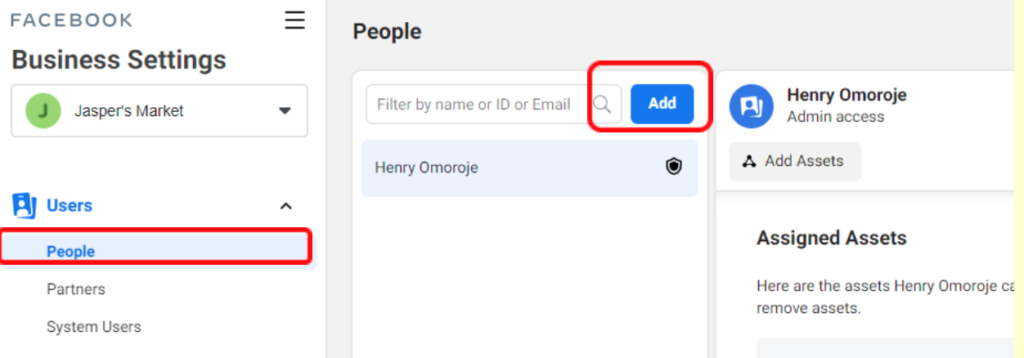
Now that we have added Ad account, let’s add people and grant them fine-grained access control to our business manager’s assets. Remember that this comes with an Admin privilege, and only the admin can add people to the Business manager. Also, don’t add people if you don’t trust them.
To add people, click on “People” and click on the “Add” button.
How to Add Roles to People in Business Manager
When you click on the “Add” button, a dialogue box will display, giving you options to select the role to assign them. You will be given either “Employee” or “Admin.” Access. By default, Facebook* will recommend “Employee” access. You can choose “Show advance” for more access options. Provide the employee email address (not necessarily their personal email. It can be a business email address). Choose the access role and click “Next.”
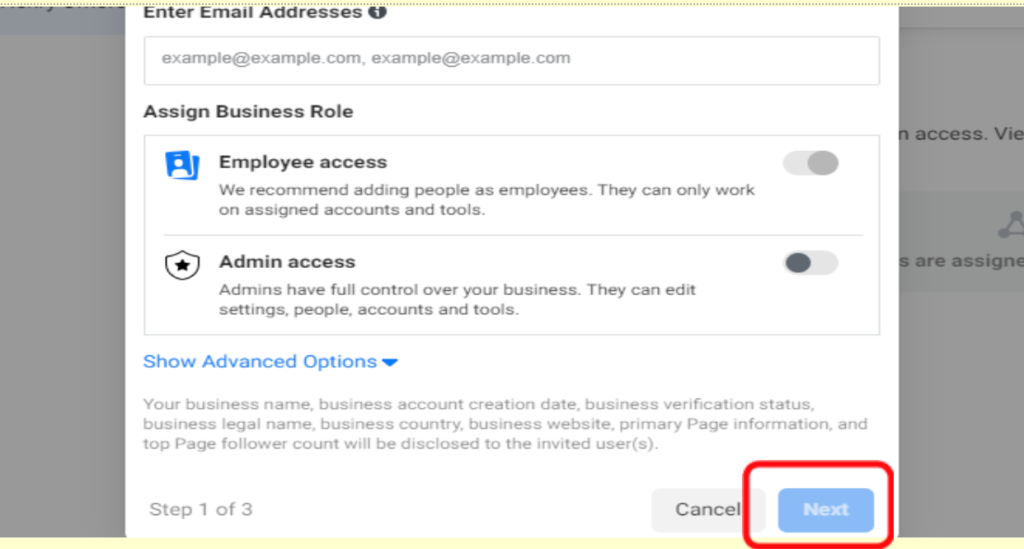
Note that: Before accepting your invitation, the person would need to have created or have a Facebook account*. This is one way of identity verification. Once all this process is completed and the person has accepted the invitation, you can move on to assigning them your business assets.
How to Add Pixel to Business Manager
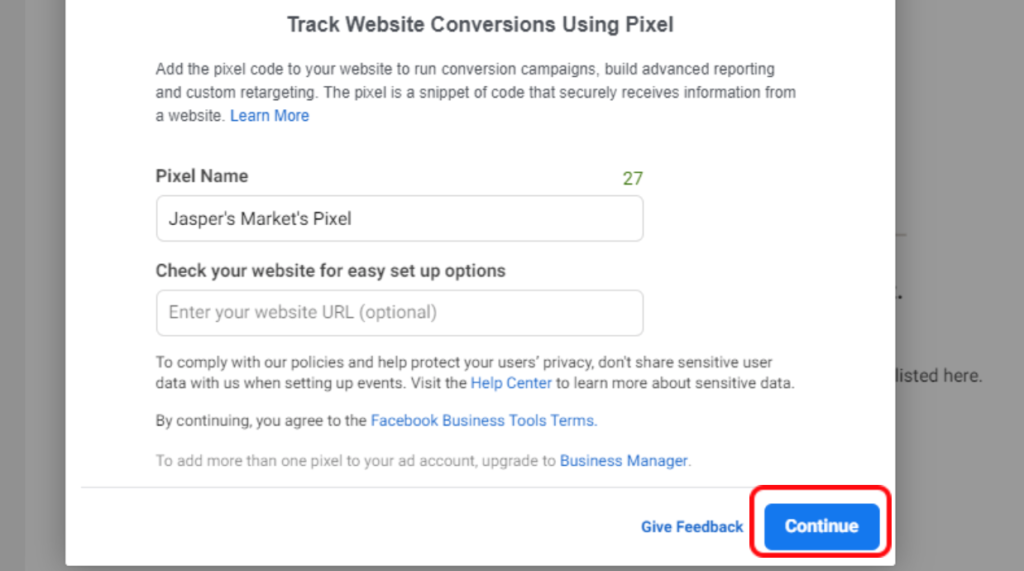
Facebook* embedded pixel to every Business Manager to help monitor activities as people interact on your website. A Facebook pixel* is a piece of code built to your website to report conversation and build insights. Every Business Manager you create can have a maximum of 100 pixels.
To add pixel to your Business Manager: Click on “Data Sources” => Select “Pixels” => Click the “Add” button =>

Enter the name of the pixel => Enter website URL => Click “Continue”
How to Add Instagram* Account to Business Manager
To increase your presence, you need to integrate Instagram* into your Business Manager and then associate them to ad accounts or partners that are in your Business Manager. Then, again, you need to set necessary task-based permissions for your Instagram business account.
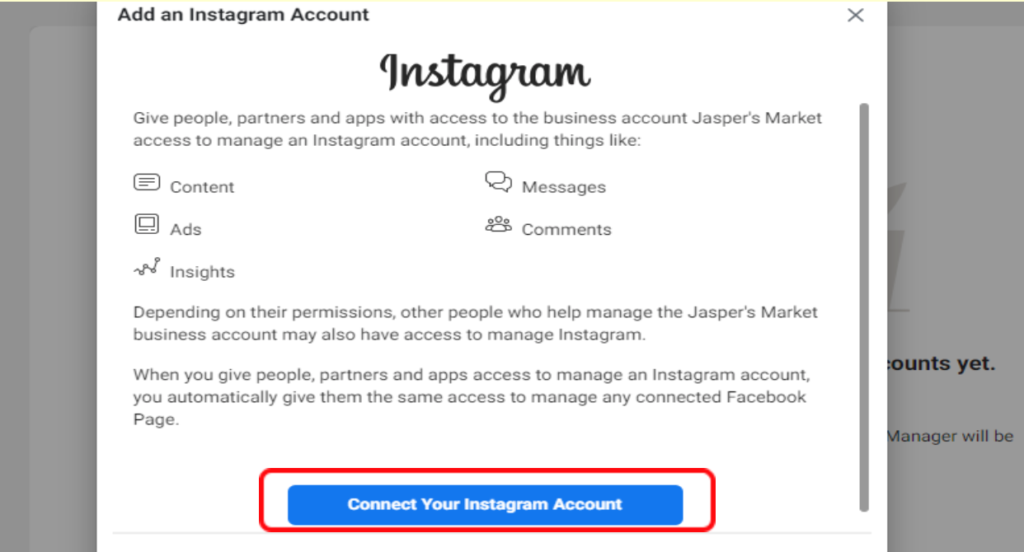
To add Instagram* business account, go to Accounts=>Instagram* Accounts=>Add=> Connect your Instagram* Account=> Enter username and password of your Instagram* account. A verification code may be sent to your Instagram* registered phone number or email.

When you click add, it will redirect you to another dialogue page where you can connect to your Instagram* account. Click on the “Connect Your Instagram* Account” and fill in your Instagram* credentials.
Note that the ad and Instagram* account must be in the same Business Manager for it to be able to make a connection. You can’t associate an ad account and Instagram* account to a different Business Manager.
Conclusion:
Your Business Manager is set and ready to explore and show off what you have in stock to the world.
For convenience and ease of management, Facebook* has also developed an android and iOS Facebook Business Manager app* that enables you to manage your businesses at a go.


